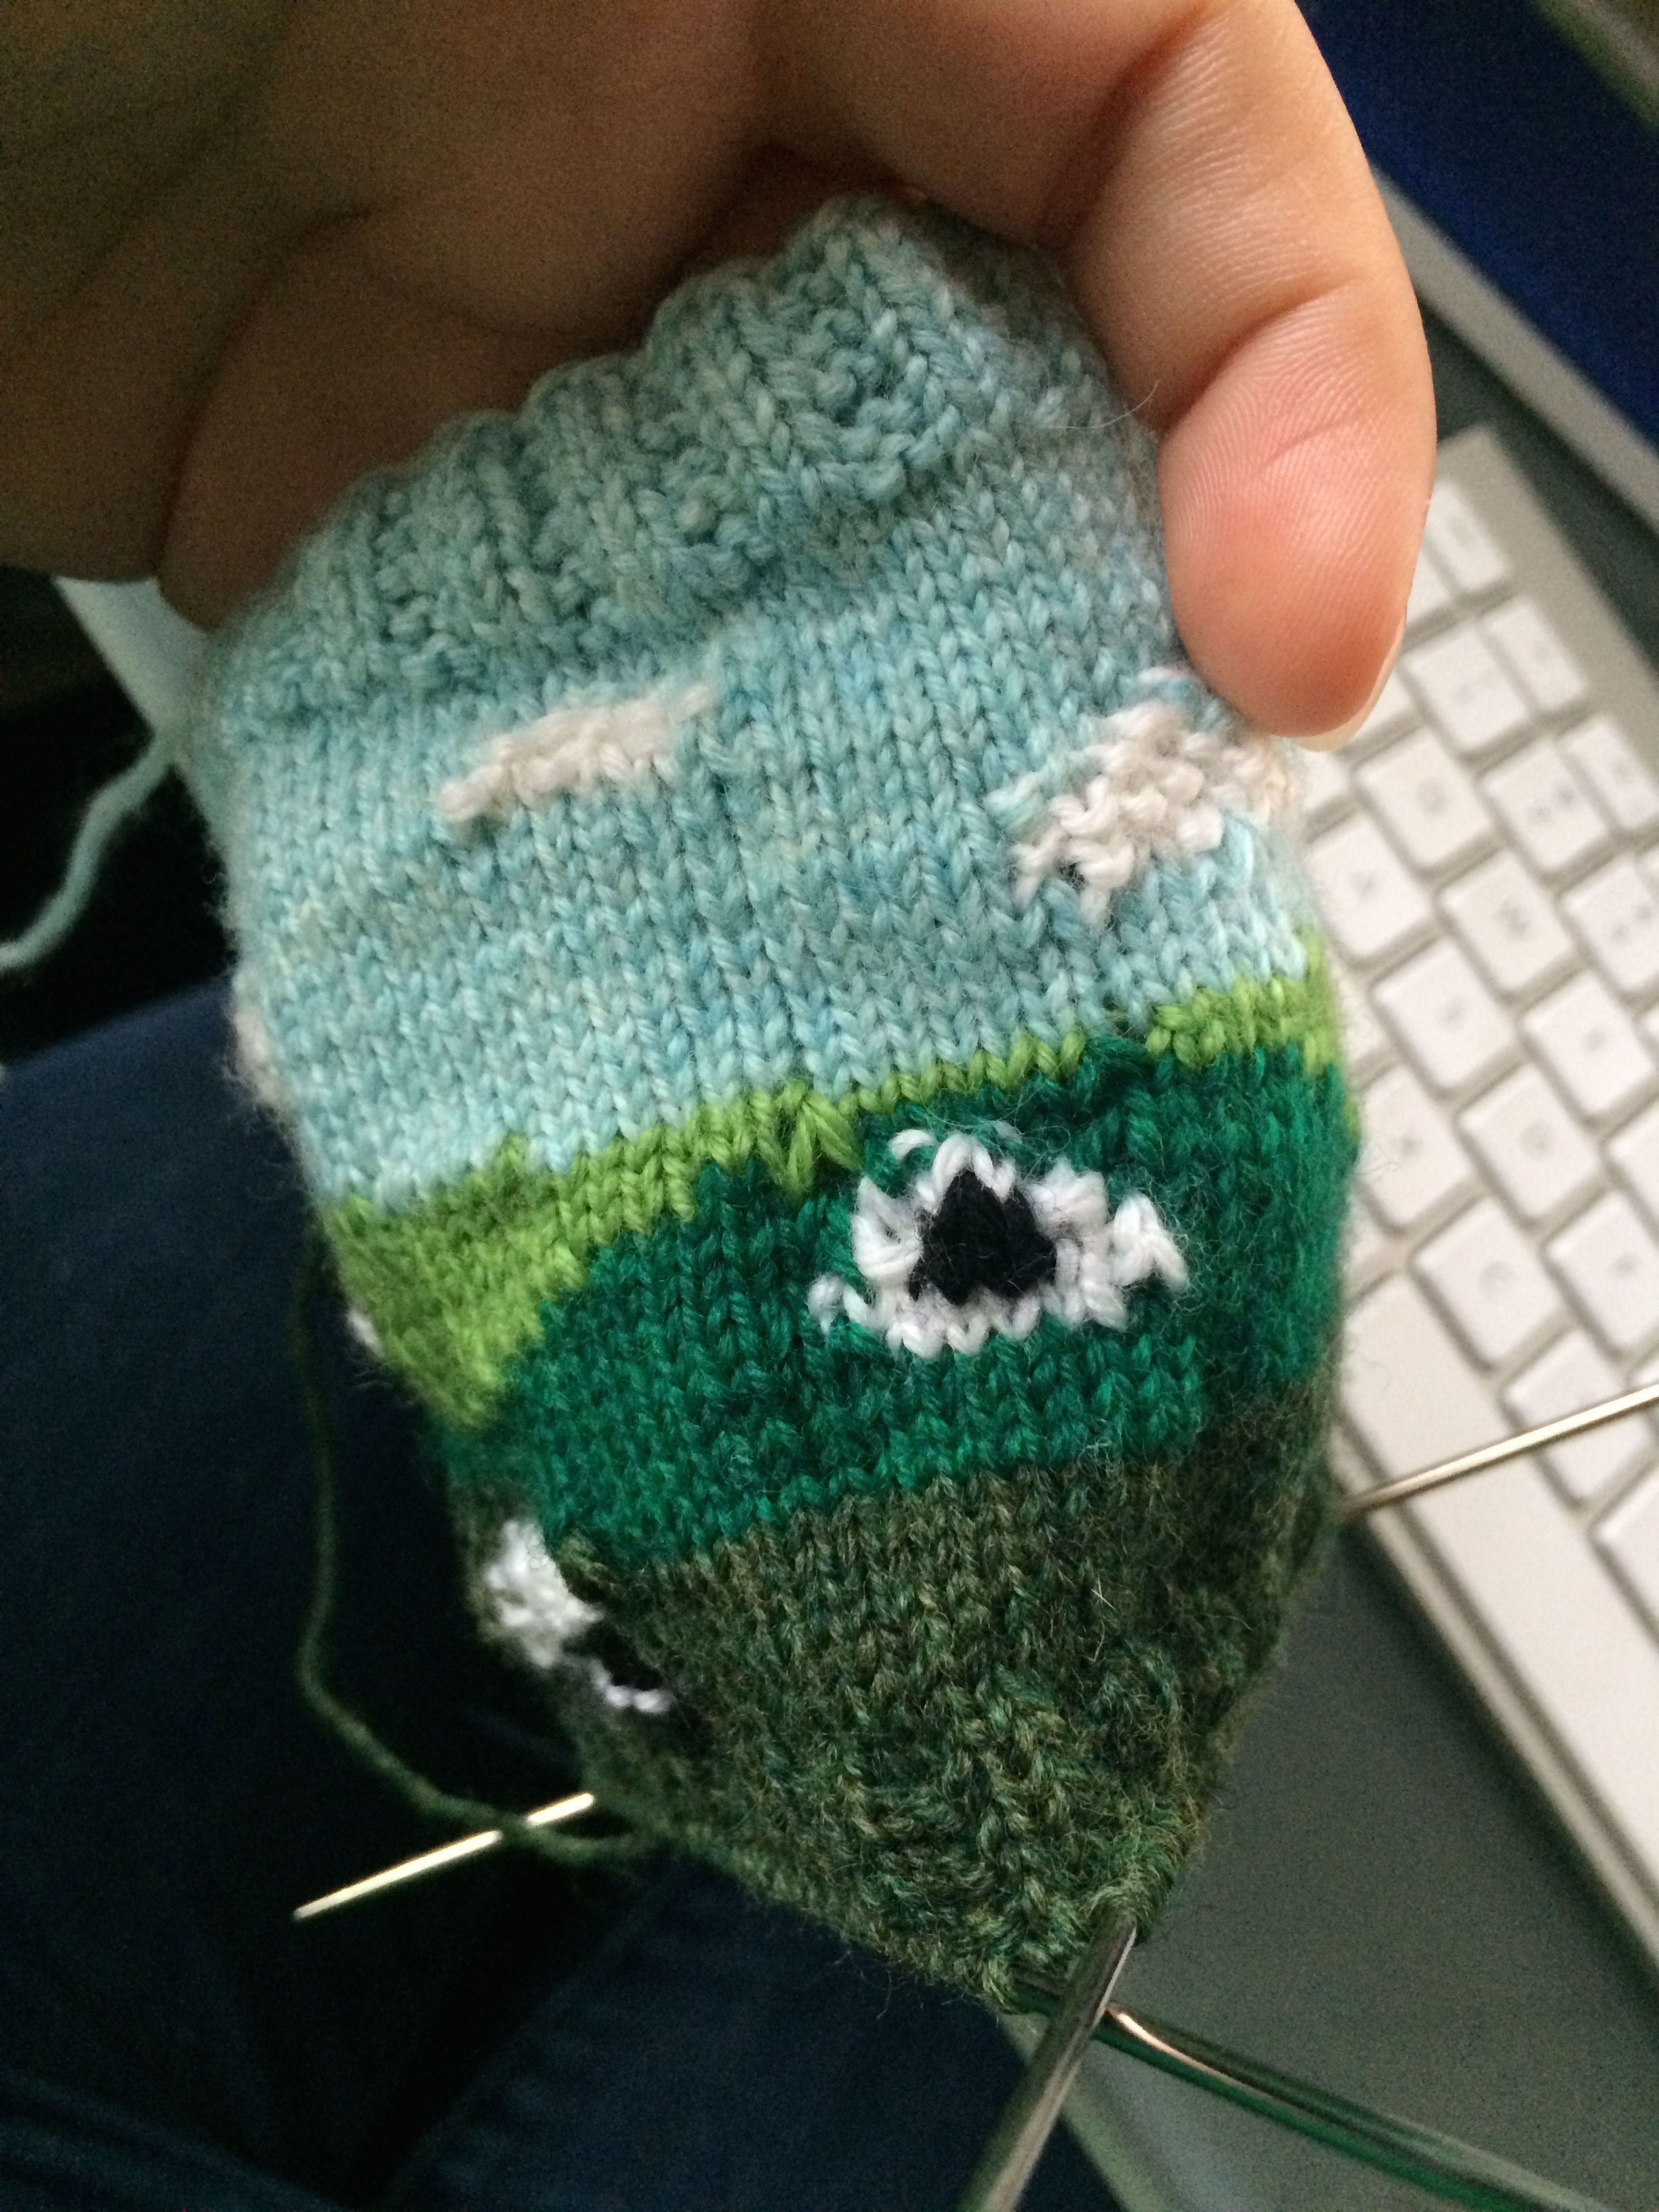
I’ve been working on a test knit for my mug cozy for probably a month, picking it up and putting it back down. The intarsia was a slow process, since I designed the color changes based on my own visual likes rather than ease of knitting. I’d also never done intarsia knitting before this.

With intarsia, you create a new little bobbin of yarn to work from each time there is a color change. So, you’re knitting around in blue, get to a cloud, switch to a small bit of white, then switch to a new bit of blue (that’s right, you don’t just pick up the old blue you were using before until you come back around). Because you don’t bring the yarn along behind the work, every time there is a color change, you get a new bit of yarn. For every new bit of yarn, there is going to be an end to weave in.

As I was designing this, I had no experience with intarsia, therefore, gave no thought to how many ****ing ends there would be to weave it when I finished the cozy.

I don’t even want to pretend I’m going to finish this test knit.
But either way, NAILED IT!

Hahaha, just kidding. This poor mug cozy is a step away from being knitted vomit.
Aside from being a finishing nightmare, my technique was just not very good. The randomly loose stitches above would be fixed after I weaved in the ends of the yarn — they’re just loose because they’re not quite attached.
The blob thing that should be a sheep in a pasture though… wowwee.
I knit the clouds in seed stitch – k1, p1, then on the next row I’d purl the knits and knit the purls, creating these cute, fluffy clouds because purl stitches create a little horizontal bar that puffs out a bit.
The problem with purl stitches in colorwork is that the previous stitch is visible behind the purl bar. Not so noticeable when it’s white on light blue, but super noticeable when it’s white on dark green. I wanted the sheep to be fluffy, so I tried the same thing on them.

Another issue I had was in using this technique to be able to knit in the round while still using the intarsia technique. I thought I did this correctly everytime I turned my work, but apparently not because the start/end section of the mug cozy looks quite… jacked. If you’re not a knitter, just notice how most sections have a straight line of Vs going down, but in the middle… who knows what’s happening? Also, you should become a knitter.

And my last gripe with this is that the green on the bottom needs more saturation. It’s being ousted on the next run.
So, it’s back to the drawing board with this pattern. Lessons learned:
- Practice the intarsia in the round technique way more, or just knit it flat and sew it into a cylinder when you’re done.
- Make sure your yarn colors are all equally saturated or it just looks sad.
- Don’t try to be cute with your fluffy purl stitches when doing high-contrast colorwork.
- It may not be worth the pain to create a color chart based solely on visual design — take the knitting experience into account and try to reduce the number of ends that will need to be weaved in at the end.
Read more about my adventure in creating my first knitting pattern:

4 Replies to “Knitting Pattern: Nailed It! (NOT)”